Wednesday, 27 May 2015
Tuesday, 28 April 2015
Thursday, 23 April 2015
Saturday, 18 April 2015
Thursday, 16 April 2015
Gunpla Newbie Guide: How to choose your first kit
Hi, it's been quite long since my last guide. Today I would like to share some tips on how to choose your first gunpla kit:
Tips #1: Understand the difference in Grade and Scale
Gunpla kits generally come in High Grade (HG), Real Grade (RG), Master Grade (MG) and Perfect Grade (PG). Of course, there are also other grades like Advance Grade (AG) and some non-graded gunpla kits available.
With so many grades available, what are their difference actually? The grade of gunpla kits usually determine the size, amount of detailing ( number of parts. stickers & decals) and how posable the Gundam model is.
I will mainly focus on HG, RG, MG and PG in my discussing as they are more common available in the market nowadays.
HG usually come in scale 1/144 (there is some HG kits that come in scale 1/100), and of less detail compared to RG, MG and PG. It also take the least time to complete (I mean straight build) if compared to other kits. In my opinion, HG is more suitable for beginner to start with, because it looks as good as other types of kit (usually looks better than no grade / AG), moderately posable and easy to assemble. Also, there will probably less "weak joint" issues with HG kits as they are not intended for advance posing. You can probably start building a few HG kits as practice, before proceed to other kits of higher difficulty.
RG comes in scale 1/144. Highly detailed, highly posable and nice finishing. However, I would not suggest this as a starter kit as it is even more challenging to build a RG than MG, as its parts is smaller and more fragile as compared to MG (RG is just like a minimized version of MG), Also, it may have weak joint problem. Therefore, to have RG posable, posing stand is definitely a must. A RG kits is also comparatively more time consuming to build if compared to HG.
MG is a more detailed and more posable kit if compared to HG. However, the parts available in MG is more than in HG, therefore it will most likely to take a longer time to build a MG kit than a HG kit but it will not be much difficult. You can probably start investing in MG kits after you have gain more familiar in HG kits. The parts is also more solid is compared to RG kits.
PG comes in scale 1/60, and it is highly detailed and nicely finished. PG comes with many parts and it takes very long time to complete. In term of difficulty, I will rate it to be same as MG, only than it is much more time consuming.
Tips #2 Choose the Right Kit
As what I mentioned earlier, HG is probably the most suitable kit to start with, as it is usually nicely finished, moderate posable (newer kit even getting better), and it take shorter time to build. Of course, you can still start with other grade, as long as you pay extra careful as you build the kit (they are more costly).
Tips #3 Colour Scheme of Gunpla Kits
A lighter color scheme gunpla kits will be more preferable for a beginner. Take a HG Strike Gundam as example (please take a look at the profile picture of my blog), it is mainly white in colour. A light colour scheme will make nub mark and scratches on gunpla kits less visible (as beginner, I assume that your skills will not be too good). In short, lighter colour scheme can tolerate more mistakes (hopefully not so much).
Tips #4 Time to choose your favorite kit
After filter down into the right grade, the right colour scheme, now you can choose your favorite Gundam model. However, this guide only serves as a guide and my personal opinion. YOU CAN ALWAYS CHOOSE WHAT YOU FEEL BEST FOR YOURSELF.
Thank you. Hope you find this guide useful. By Gundam Kaiser.
Friday, 10 April 2015
Tuesday, 7 April 2015
Monday, 30 March 2015
Saturday, 28 March 2015
Gunpla Newbie Guide: How to remove nub marks using simple tool
New in building gunpla? No proper tools to use for building gunpla? No worries !!
3) Fine trimming using pen knife
In most case, people prefer using art knife instead of a pen knife, because it is easier to control and safer. However, I prefer pen knife because it prevents me from "over-cutting" the gunpla part, because surface area of blade is large enough, which allow me to maintain it parallel with the gunpla part surface when cutting. I just need to slice off the excessive part until the surface is flat.
4) Cleaning off the gunpla part
Now you just need to simply rub off the remaining dust or some plastic that still sticking on the nub mark using your finger and nail. You can also wet the surface with water to clean it off.
5) Finally~ ta da~~~
Now you have a smooth surface and a less visible nub mark on your gunpla part.
By simply using a nail cutter and a pen knife, you could build your favorite Gundam model.
In this tutorial, I will be showing you how to remove nub marks on gunpla part by using the simplest tools available.
1) Removing a gunpla part from the "frame"
Since you are still new in building gundam, most probably is that you do not have proper tools to use. No worries, using a nail clipper to remove/detach the gunpla part from the frame is perfectly fine as long as you use it correctly.
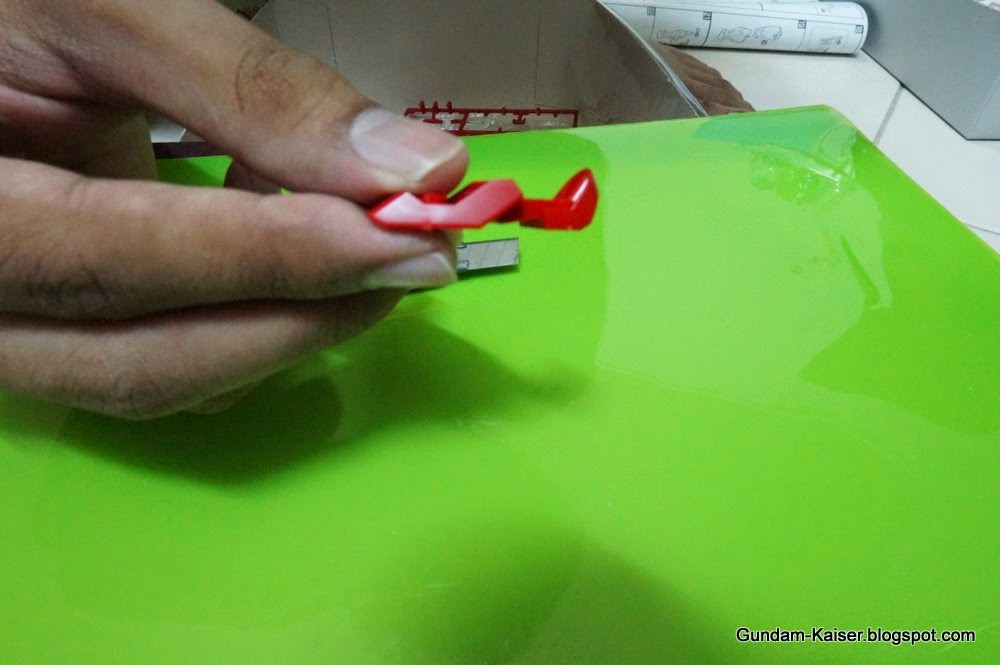
Since you are using a nail cutter, it is better for you to maintain a distance as you cut. You can still trim off the excessive part afterward using nail cutter or pen knife.
**Caution** cutting too near to the gunpla part may damage/scratch your gunpla part and leave a more severe nub mark. Because the nail clipper blade is not flat but curve in shape.
2) Trim off the excessive part
After removing the gunpla part from the "frame", there will be excessive parts attached on it, which will leave a nub mark if not properly removed. Just trim off until where your until where your nail cutter can reach (only if you are using a nail cutter). As I mentioned earlier, don't cut too near to the gunpla part.
Excessive part after remove gunpla part from "frame"
3) Fine trimming using pen knife
In most case, people prefer using art knife instead of a pen knife, because it is easier to control and safer. However, I prefer pen knife because it prevents me from "over-cutting" the gunpla part, because surface area of blade is large enough, which allow me to maintain it parallel with the gunpla part surface when cutting. I just need to slice off the excessive part until the surface is flat.
Nub mark left after removing excessive part
Fine trim the excessive part by maintaining the blade parallel with the surface of gunpla part
4) Cleaning off the gunpla part
Now you just need to simply rub off the remaining dust or some plastic that still sticking on the nub mark using your finger and nail. You can also wet the surface with water to clean it off.
Rub off the remaining plastic sticking on the nub mark area
5) Finally~ ta da~~~
Now you have a smooth surface and a less visible nub mark on your gunpla part.
A smooth surface and less visible nub mark
Thank you for spending your precious time reading this tutorial. Hope you find it useful =)
Friday, 27 March 2015
Thursday, 26 March 2015
Wednesday, 25 March 2015
Tuesday, 24 March 2015
Subscribe to:
Comments (Atom)


